Average response time: under 24 hours
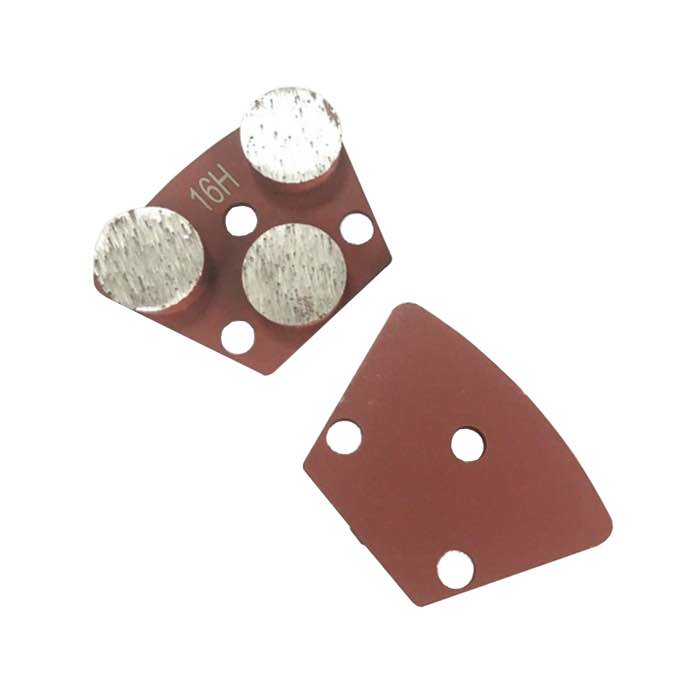
An exposed-aggregate look keeps coarse stones and sand of the mix visible through a polished or matte finish, rather than hiding them under a cement paste film. The result depends on opening-cut depth, how evenly the aggregate was batched and placed, and whether the approved look is reproduced across every bay. This guide for the PM and owner representative covers exposure grades, cut depth, sample-panel approval, defects and acceptance clauses.
Figures below are working ranges for interior slabs and topping surfaces where an aggregate finish is specified. Local mix design and maximum aggregate size can shift the achievable exposure, so the sample panel always governs the bulk floor rather than a written description alone.
The finish exposes fine sand and coarse aggregate trapped under the cement paste of a finished slab. Light grinding breaks through the paste to show sand only; a deeper cut reveals the coarse stones. Unlike a decorative overlay, the finish sits directly on existing concrete, so available exposure is limited by what the original mix and placement left behind. An over-troweled slab may give uneven deeper exposure and need more opening passes.
Profile grades run from CSP 1 to CSP 7. CSP 1–2 is a heavily opened surface, coarse aggregate fully exposed; CSP 3–4 shows medium aggregate with balanced sheen; CSP 5–7 is fine grind, near mirror, little or no visible exposure. Match the target grade to the spec and record it on the sample panel. A grade between bands, such as partial stone over sand matrix, should be drawn on the panel rather than named loosely in the contract.
| Exposure grade | Typical look | Opening grit | Where it suits |
|---|---|---|---|
| CSP 1–2 | Heavy aggregate, coarse texture | 16 / 20 grit metal | Industrial floors, slip zones |
| CSP 3–4 | Medium aggregate, balanced sheen | 30 / 40 grit | Retail, corridors |
| CSP 5–7 | Fine grind, near mirror, little exposure | 100 to 400 resin | Showrooms, offices |
| CSP 3–4 mixed | Mixed exposure, consistent grain | 40 grit then 100 | Mixed-use lobbies |
Aggregate consistency starts before grinding: source stone, maximum particle size, sand grading and cement content determine what shows after the paste is cut away. Two pours of the same mix can differ if placing, vibration and troweling varied. Walk the slab in a 2 to 3 m grid after opening and compare stone size and spacing between bays; sparse stones read as a patch even if sheen matches. Record segregation, honeycomb or washed-out areas for repair before resin passes.
Opening starts with metal-bond diamonds 16, 20, 30 and 40 grit to level joints and break the paste, then resin pads 100, 200, 400, 800, 1500 and 3000 grit toward the chosen sheen. Cut depth controls exposure: remove only paste film for sand, deepen roughly 1 to 3 mm for coarse stones, and stop before aggregate loosens or pops out. One grit per pass; a deep prior scratch cannot be closed by the next resin pad. Check in 300 to 500 lux oblique light after each stage.
Cut a sample panel of at least 1 square meter at an edge or inconspicuous zone before the bulk pass, to target sheen and exposure. It should show the actual aggregate mix, not a sample from another pour. Record approved grade, grit sequence, gloss reading and sealer choice on a sign-off sheet, and keep the panel protected. Bring any out-of-site reference sample or photos to the panel meeting rather than promising a match.
Work the slab in planned bays of 50 to 100 square meters, keeping grit sequence, passes and densifier rate identical in each bay. Blend bay transitions on the last resin pass to avoid a lap line, and compare each finished bay against the approved panel under the same 300 to 500 lux light. Check 60 degree gloss at 2 to 3 m spacing: adjacent areas differ up to 5 units; above 15 the bay was skipped or over-polished and needs rework.
Over-cut loosens aggregate, leaves pits around stones and exposes mortar pockets; bare spots are zones where paste still covers aggregate because opening was too light. Segregation shows as clustered stones in one area and fines in another, usually from placing or vibration. Mark defects after opening: pop-outs need a patched and re-opened area, bare spots one more opening grit, and segregation is flagged to the owner before sealing, not hidden under sealer film.
Most disputes come from the owner expecting a uniform stone pattern from a mix not designed for exposure. The spec should state exposure grade, aggregate size range, sheen target and that natural variation in stone color and spacing is expected. Close the job with a walkthrough against the signed panel: gloss readings, exposure comparison, defect photos and maintenance schedule. Keep the panel for warranty comparison; sealer re-coat runs 3 to 5 years general, 2 to 3 years heavy traffic.
When exposure grade, cut depth and sample approval are fixed in writing before the bulk pass, the finish reads as one consistent surface and disputes stay minor. The contractor confirms what the mix can show, reproduces the approved panel across bays, and delivers acceptance checks the owner representative can sign without qualification.
Written and reviewed by JOY TECH - an SGS & BV audited, CE/RoHS certified diamond tools manufacturer founded in 2004, exporting to 50+ countries.
Our factory and quality management system are audited by SGS and Bureau Veritas. Products meet CE/RoHS requirements and every piece is 100% inspected before packing.
Verified Certificates
