Average response time: under 24 hours
Grind concrete before laminate or vinyl to a 3 mm gap under a 3 m straightedge, with no high ridges, no trowel marks and no residual adhesive left in the pores. Run a 60 grit metal-bond pass to knock down highs, follow with a 120 grit pass to refine, then HEPA-vac and, for glue-down vinyl, screen with a 180 grit abrasive. Do not grind to a polish; you want a fine, matte, porous surface that the underlayment or adhesive can grip, not a mirror. Test moisture with a calcium chloride kit before any glue-down product ships.
Laminate and luxury vinyl plank (LVP) float over a thin underlayment, and the underlayment only masks small imperfections. A ridge of 2 mm becomes a soft spot under the planks within a year, and the seam opens. Glue-down vinyl is even less forgiving: any void under the adhesive shows as a hollow spot within weeks. Flooring warranties almost always require a flat, cleaned, profiled slab, and grinding is the documented way to deliver it.
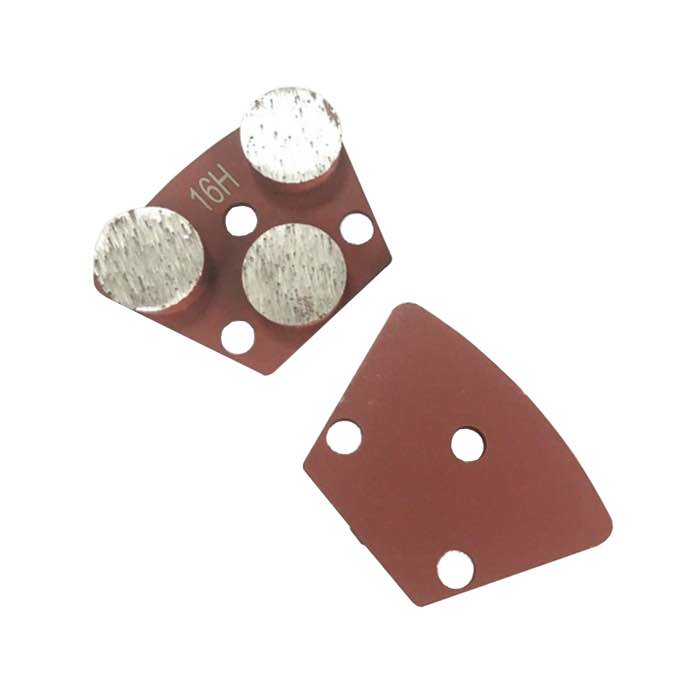
For interior prep jobs, single-disc walk-behind grinders outfitted with standard trapezoid holders in the grinding tooling range are the right call; they are light enough to move between rooms and leave a scratch pattern that sits under the flooring without telegraphing.
Most laminate and LVP warranties ask for a maximum deviation of 3 mm over 3 m. Glue-down sheet vinyl and VCT often ask for 2 mm over 3 m. Lay a 3 m straightedge across the floor and feel under it with feeler gauges. High spots are ground down; low spots are filled with a latex self-leveling compound after grinding, never ground around. Mark each high spot with chalk so you do not lose it mid-pass.
Flooring manufacturers typically cap moisture at 3 pounds per 1,000 sq ft per 24 hours for glue-down vinyl, and require a pH between 9 and 10. Test before you grind, because grinding opens the slab and changes the reading on the surface. If moisture is high, stop and address the vapor barrier or ventilation rather than fighting it with adhesive. A failed glue-down vinyl job costs far more than delaying the install by a week. Run the test in the wettest corner of the room, not in the center, because the corner tells you the worst case.
Use a 30/40 or 60 grit metal-bond plate, and walk only the high spots the straightedge flagged. Do not grind the whole floor just to fix one ridge; you will create new lows. Keep the grinder moving at a steady pace and overlap passes by 2 inches. On an old adhesive remnant, switch to a PCD segment or a heavy cup wheel such as double-row diamond cup wheels to chew through the black mastic before you switch back to standard segments.
Follow with a 120 grit metal-bond or a 100 grit resin-bond pass across the whole room. The goal is a uniform matte scratch pattern, not a polished shine. Walk the floor with the straightedge again and re-grind anything over tolerance. Sweep and vacuum between grits so coarse dust does not scratch the finer finish you are building.
For glue-down vinyl, screen with a 180 grit abrasive to open pores without leaving deep scratch grooves. For floating laminate, the 120 grit pass is usually enough. Blow out the floor with an oil-free air nozzle, then HEPA-vac, then damp-mop with neutral cleaner and let it dry fully. Walk the final surface with a white cloth; no gray dust should transfer. If the cloth picks up powder, you are still in the cleanup stage, not ready for flooring.
Run the straightedge again, feel for grit under your palm, and check that no dust sits in the control joints. The floor should be a uniform light gray, dry, and free of visible scratches deeper than 120 grit. Walk the room with a white cotton sock on your hand; any gray transfer means the vacuum pass was incomplete. For glue-down vinyl, do the money test: press a square of the actual adhesive to the scrap slab and let it cure 24 hours. It should pull away in a cohesive break, not peel off clean. If you are unsure whether your slab meets a specific LVP warranty, send photos and moisture numbers through contact us before you order material.
Written and reviewed by JOY TECH - an SGS & BV audited, CE/RoHS certified diamond tools manufacturer founded in 2004, exporting to 50+ countries.
Our factory and quality management system are audited by SGS and Bureau Veritas. Products meet CE/RoHS requirements and every piece is 100% inspected before packing.
Verified Certificates
