Average response time: under 24 hours
Grind a garage floor for a coating in four stages: pull oil and grease stains, run a 30/40 grit metal-bond pass with a 270 mm grinder to open the surface, follow with a 60/80 grit pass to level swirl marks, and finish with a 120 grit pass that leaves a Concrete Surface Profile of CSP 3 to CSP 4. Stop when the floor is a uniform matte gray with no trowel marks, no laitance, and no exposed aggregate. Blow out or HEPA-vac the floor, and apply the coating the same day or within 24 hours before moisture and contamination return.
Acid etching leaves a chalky residue, misses trowel marks, and cannot open a dense power-troweled garage slab reliably. Grinding gives you a consistent mechanical profile, removes laitance, opens pores, and lets you see the slab's true condition. It also controls silica dust when tied to a HEPA vacuum, which acid etching never addresses. For a coating expected to last five years or more, grinding is the prep that actually delivers on the warranty.
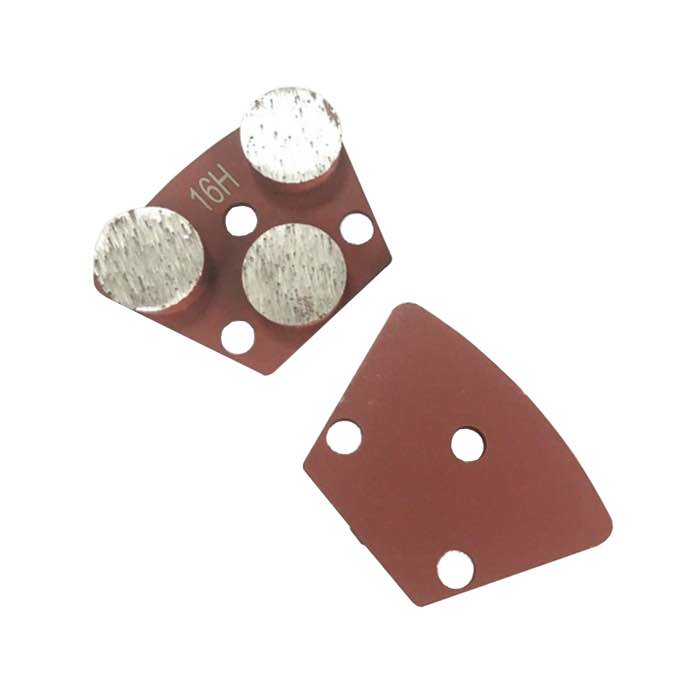
Use the right holder for the job: trapezoid plates like the JOY-TP-R3 clip onto most 270 mm walk-behind grinders and carry the 30/40 through 120 grit sequence cleanly. The full lineup lives in our concrete grinding tooling range, so you buy one holder and swap segments as you move through the grits.
Sweep the floor, blow out the corners, and degrease oil spots with a concrete cleaner. Oil that has soaked deep into the slab must be cut out or treated with a denaturing product; grinding over a dark stain just spreads the oil into the coating and causes a delamination later. Move the car out, disconnect the garage door opener so the door stays up for ventilation, and protect anything you do not want dust on.
Hairline cracks under 1 mm can be ground over. Bigger cracks, spalls and spalling control joints should be filled with a fast-setting epoxy mortar the day before grinding, so the grinder crosses them without catching. Snap chalk lines across the bay so you can track which passes are done. Tape off the bottom of walls and door frames to keep dust off the paint.
Run the grinder in overlapping 2 inch passes, moving slowly enough that the segments stay in contact. This pass removes laitance and any thin cure compound. Expect to change direction 90 degrees halfway through the bay so the floor does not develop a one-direction swirl. A 270 mm grinder covers roughly 200 to 300 sq ft per hour on this first pass, so a 500 sq ft garage takes about two hours.
Walk the same pattern again with finer segments. This pass knocks down the ridges left by the first pass and gives you a uniform scratch pattern. Inspect at a 45 degree angle under a bright light; any shiny trowel mark means that spot needs another trip. Do not skip this pass because the floor looks ready; the coating will telegraph every swirl you missed.
The final pass sets the CSP level most epoxy and polyurea coatings want, which is CSP 3 to CSP 4. Run lighter pressure; the goal is to refine, not to cut deeper. Stop frequently to vacuum and feel the profile with the palm of your hand. It should feel like fine 80-grit sandpaper, not like polished stone.
The walk-behind leaves a 3 to 4 inch unground border along the walls. Finish that strip with a handheld cup wheel fitted with the same grit you used on the last machine pass; a set of double-row diamond cup wheels moves through edge laitance fast and leaves a scratch that matches the floor. Blend the edge so the coating cannot see a seam between the two passes. Pay special attention to the corners, where dust settles and where the coating thins first. Aim for zero visible transition line when you look across the wall at floor level.
The slab is ready when the whole floor is the same matte gray, when you cannot feel trowel marks, and when a section of masking tape pressed to the floor pulls up clean. Apply the primer or base coat the same day. If more than 24 hours pass, blow out the floor again before coating. For questions about grit selection on a specific slab, send us details through contact us.
Written and reviewed by JOY TECH - an SGS & BV audited, CE/RoHS certified diamond tools manufacturer founded in 2004, exporting to 50+ countries.
Our factory and quality management system are audited by SGS and Bureau Veritas. Products meet CE/RoHS requirements and every piece is 100% inspected before packing.
Verified Certificates
