Average response time: under 24 hours
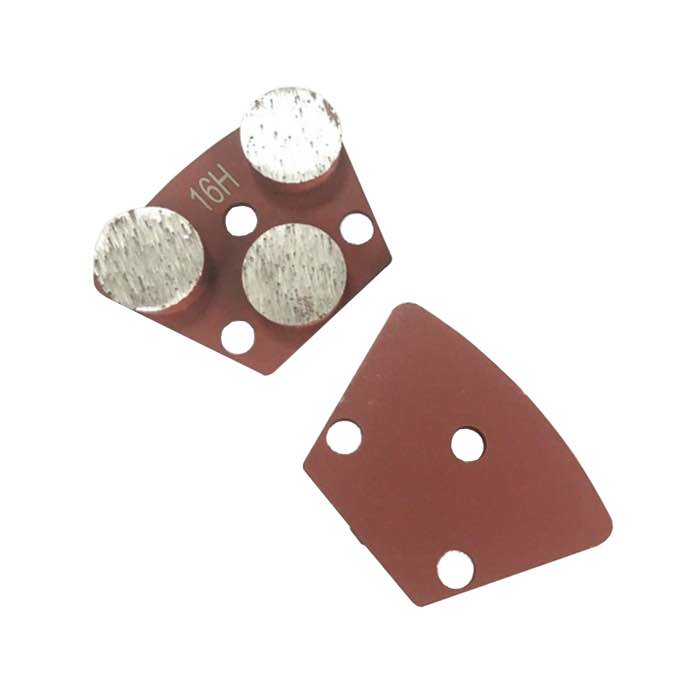
Grind a 6 to 50 mm concrete overlay in passes of no more than 0.3 mm per pass, never in one deep cut. Start with a 30/40 grit metal-bond plate on a low-speed walk-behind grinder, walk the floor in overlapping directions, and stop the moment you see coarse aggregate or the original slab showing through. Most overlays are only 10 to 30 mm thick, and one aggressive pass can break through into the substrate and ruin the job. If you need to remove more than half the overlay's thickness, plan two days of light passes rather than one heavy day.
An overlay is not structural concrete. It is a thin, often polymer-modified layer poured on top of an existing slab, and it bonds at the interface with a bond-breaker, scratch coat or polymer primer. That interface is the weak point. Grind too deep or too hard and you delaminate the overlay from the substrate, leaving hollow patches that will delaminate further under traffic. Depth control is not just about not hitting the slab; it is about not shocking the bond line.
Choose segments that cut cleanly without gouging. Trapezoid plates in the grinding tooling range let you dial in light, consistent passes; for very thin overlays, a 12-arrow segment cup wheel on an edge grinder gives you finer control along walls and control joints where a wide walk-behind cannot reach.
Before you touch the grinder, drill a small hole with a 10 mm masonry bit in an inconspicuous spot and measure how deep the overlay goes. Stick a nail in, pull it out, and see how far it went before it hit the old slab. Write the number on a piece of tape on the machine. If the overlay is 15 mm, you know your absolute breakthrough limit is 15 mm, and you plan to stop at 10 mm so the interface stays intact. Measure at least three spots: overlays are rarely the same thickness everywhere.
Polymeric and micro-toppings run 3 to 10 mm and are fragile; thin-broom overlays run 10 to 25 mm; self-leveling overlays run 15 to 50 mm. Each class wants a different approach. A 5 mm micro-topping is almost never ground aggressively; it is screened lightly to open the surface. A 30 mm self-leveler can take a real grinding pass, but still in layers. When the spec sheet is missing, assume the thinnest case until you have drilled and measured. Under-grinding beats over-grinding every time, because a light surface can be re-opened, but a breakthrough cannot be patched invisibly.
Set the grinding head so the segments just kiss the surface. Walk the floor at normal pace. This pass removes laitance and opens pores without cutting deeply. Look at the dust color: uniform gray means you are in the overlay. Darker patches mean you are near the interface; lighter, sandy dust means you have already broken into the substrate. Stop the machine and inspect that corner.
Increase depth by 0.2 to 0.3 mm per pass. Walk the floor in a second direction 90 degrees from the first. Inspect after every pass: touch the surface, look for exposed large aggregate, and check for hollow sounds by tapping with a small hammer. Any hollow sound means the overlay has lifted; stop and patch it rather than grinding through it. Mark the spot with chalk so you remember where the weak zone is.
Finish with a finer grit (80 to 120) and the lightest contact. The goal is a uniform matte surface ready for sealant or coating, not a deep cut. Total material removed should stay under 60 percent of the overlay thickness; beyond that, the bond line is at risk. Walk the floor with the palm of your hand; it should feel like fine sandpaper, not like exposed stone. If you can see a reflection off the surface, you have burnished it and will need to back up one grit and reopen it.
If you find large delaminated areas before you start grinding, do not try to grind them flat. Cut out the loose overlay, re-patch, and let it cure for seven days before resuming. Grinding over a hollow patch will dislodge it mid-job and leave a crater. For help matching segment bond to your overlay mix, send us the compressive strength and thickness through contact us.
Written and reviewed by JOY TECH - an SGS & BV audited, CE/RoHS certified diamond tools manufacturer founded in 2004, exporting to 50+ countries.
Our factory and quality management system are audited by SGS and Bureau Veritas. Products meet CE/RoHS requirements and every piece is 100% inspected before packing.
Verified Certificates
