Average response time: under 24 hours
Profile concrete for sheet or tile rubber flooring by grinding off all laitance and glossy trowel paste to a 30 to 50 grit open texture, target an Rz roughness of 75 to 100 micrometers, and hold slab moisture below 4 percent before adhesive goes down. Do not shot-blast too deep, do not leave trowel gloss, and vacuum with HEPA until a white glove wipes clean. Start at the grinding tooling guide to pick the right bond for your slab age and hardness.
Rubber sheet and tile bond with acrylic, urethane or contact adhesives that grip a microscopically rough, open cement surface. Trowel gloss, curing compound, or laitance forms a weak boundary layer; the adhesive sticks to the laitance, not the slab, and the floor delaminates in 6 to 18 months. Grinding removes that layer and leaves a tooth profile the adhesive can bite into. Under-grind wastes the adhesive; over-grind consumes more bond and raises the floor height in patches, which telegraph through the rubber as soft dips.
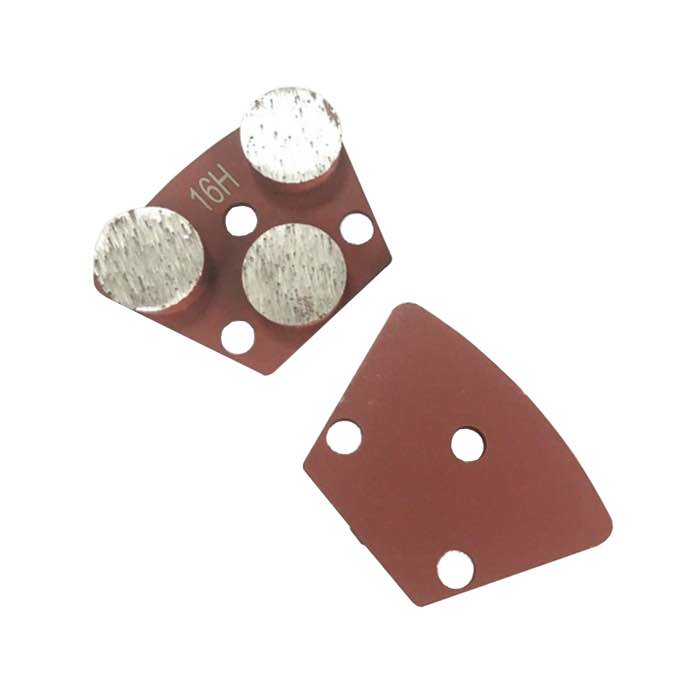
For general commercial slabs, start with 30 to 40 grit metal-bond diamond tooling and finish the prep pass at 70 to 100 grit. Softer slabs want a harder bond; power-troweled or dense slabs want a soft bond that exposes fresh diamond faster. The trapezoid triple-segment JOY TP-R3 discs cover 250 to 500 mm machines well and leave a uniform scratch pattern. After the metal-bond pass, a transitional copper-bond pad like the JOY RFP-C2 pads knocks the sharpest scratch peaks down without closing the profile, which improves adhesive trowel hold and reduces voids under the rubber.
Before any grinding, test slab moisture with a relative humidity probe or calcium chloride kit. Rubber flooring manufacturers typically require below 75 percent RH or 3 lb per 1,000 sq ft MVER. Grinding does not fix high moisture, it just hides it under flooring; the adhesive fails and you tear the floor out. Test in 3 spots per 100 m², including near exterior walls and columns where moisture tends to collect. Record the numbers on the spec sheet before the grinding crew mobilizes.
A correct prep surface has a matte, sandy sheen with no trowel gloss, no dark curing-compound residue, and uniform fine scratches you can feel with a fingernail. Tape a piece of clear plastic overnight; no condensation means you are ready. Run a profilometer if the adhesive spec demands an Rz number. Wipe the surface with a white cloth; any gray dust means one more vacuum pass, not a second grind.
Do not let foot traffic contaminate the prepared surface. Wear clean shoes, and never walk across a prepped slab after handling adhesive. The bonding window between final grind and adhesive spread is typically 8 to 24 hours depending on humidity; check the adhesive datasheet. In high-humidity coastal rooms, that window can shrink to 4 hours, so schedule the grind for early morning.
The first mistake is stopping at 30 grit and calling it done: the aggressive scratches trap adhesive voids, and the rubber delaminates in patches. The second is grinding a slab that was never moisture-tested. The third is using a polishing pad by mistake; resin polishing pads close the texture and the adhesive cannot hold. Keep polishing tooling off the prep cart entirely. The fourth is grinding over old adhesive residue without first scraping it off, which glazes new diamond segments in minutes.
Too rough (below 30 grit) leaves peaks that punch through thin adhesive and create voids. Too smooth (fine resin pass) gives the adhesive nothing to bite. If in doubt, err slightly rough and vacuum more; the adhesive datasheet trowel line sits on the spec you create. A 70 grit finish is the safe middle for most commercial rubber installations, and it leaves a profile both trowelable and grip-friendly.
Patch holes and spalls at least 7 days before prep grinding, so the repair cures and grinds at a similar rate. Grinding green patches pulls paste out and leaves soft spots under the rubber, which telegraph through the floor as soft dips. Fill control joints with a flexible joint filler after prep but before adhesive, so the rubber does not bridge the gap and crack along the joint line.
Empty the vacuum at least twice per shift; a full bin loses suction and leaves dust on the slab. Brush out corners by hand, and never use an oiled dust mop. Photograph the prepped surface before adhesive goes down; if adhesion fails later, that record tells you whether prep or adhesive was the cause. Keep the jobsite sealed from the moment prep finishes until the flooring crew walks in; even 30 minutes of unfiltered air leaves a film that weakens bond.
Rubber flooring prep is about a controlled, open, clean profile: laitance off, 30 to 100 grit scratch texture, moisture below spec, and a final HEPA clean. It is not a polish job, and rushing the grit up is the most common way to guarantee delamination a year later. Take the two extra passes and the floor will stay flat for its full service life, with no hollow spots to call back.
Written and reviewed by JOY TECH - an SGS & BV audited, CE/RoHS certified diamond tools manufacturer founded in 2004, exporting to 50+ countries.
Our factory and quality management system are audited by SGS and Bureau Veritas. Products meet CE/RoHS requirements and every piece is 100% inspected before packing.
Verified Certificates
