Average response time: under 24 hours
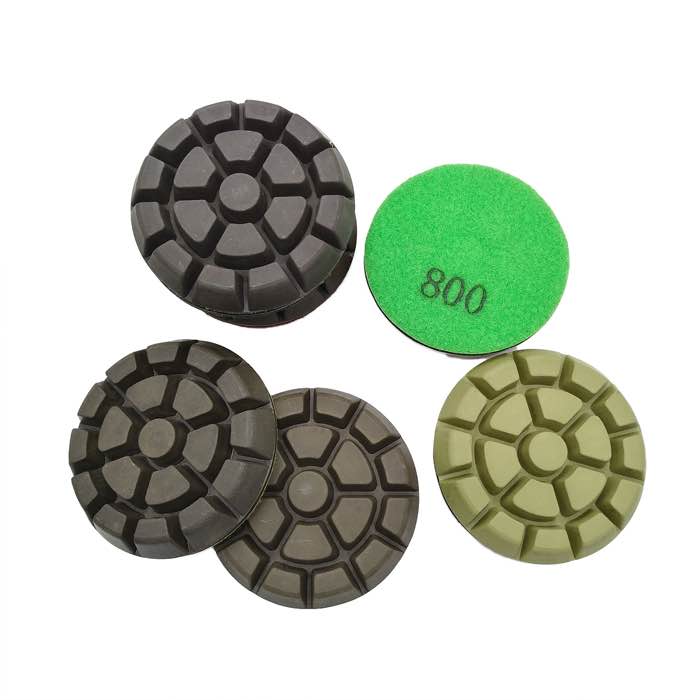
To fix scratches on polished concrete, first identify the depth: surface scratches (from grit or shoes) re-polish out with a fine resin pad (800-3000), while deep scratches (from tools or dragged metal) need a coarse metal-bond pass to remove the scratch, then the full progression back up to the matching gloss. Always blend the repair into the surrounding floor with feathered passes, and clean the area completely between grits. Deep scratches cannot be polished away — they must be ground out first.
Scratches on polished concrete come in two classes, and the fix depends entirely on which you have:
Test with your fingernail: if the nail catches, it is a deep scratch needing a coarse pass. If the nail glides over it, a fine pad will remove it. Check also whether the scratch has removed the sealer — if the floor is sealed and the scratch is deep, the repair area must be re-sealed after polishing.
Surface scratches are the easy case. Use a variable-speed polisher with a fine resin pad (1500-3000) or a high-speed burnisher, work wet with light pressure, and make overlapping passes over the scratched area. If the scratch is stubborn, step back one grit (800) then back up to the final grit. Clean the area between passes so grit does not re-scratch. A triangular resin pad is handy for reaching into the corners of a repair area, and the final burnish restores the gloss.
Where the scratch removed sealer but not concrete, clean, spot-apply sealer, and burnish — no grinding needed.
Deep scratches need the coarse pass: fit a metal-bond disc (50-100 grit) or a coarse cup wheel and grind the scratch out completely — the groove must disappear, not just narrow. Grind in overlapping passes and feather the edges of the repair area so you do not create a crater. Then run the full progression back up: 200, 400, 800, 1500, 3000, cleaning between every grit. Only the final grits restore the gloss, so the repair looks like the floor only if every intermediate step is done.
Feathering matters most here: the edges of the coarse pass must blend into the unpolished surroundings or the repair shows as a ring. Extend the coarse passes 50-100 mm past the scratch and reduce pressure at the edges. Match the final grit and sealer to the surrounding floor — see concrete polishing grit progression for the sequence detail.
Repairs are visible when the gloss or surface texture differs from the surrounding floor. Match the final pad to the floor's original finish grit (a 1500 floor stays at 1500, a 3000 floor goes to 3000), and apply the same sealer the floor carries. If the surrounding floor is dull from age, burnish the whole area lightly after the repair so the sheen matches. On a floor with a topical sealer, the repair area gets a fresh coat of the same sealer — otherwise it repels or absorbs water differently.
For scratches that appear in a ring around a previous repair, the original repair feathered poorly; the fix is to re-grind the ring with a coarse pass and re-run the sequence with wider feathering.
Finish repairs with fine diamond resin pads at the matching grit.
Surface scratches polish out with fine resin pads (800-3000) or a burnish pass. Deep scratches must be ground out with a coarse disc first, then the progression re-run — polishing alone only narrows a deep scratch.
Run a fingernail across it. If it catches, the scratch is deep and needs a coarse metal-bond pass before re-polishing. If the nail glides, a fine pad will remove it.
Fine resin pads (1500-3000) for surface scratches; coarse metal bond (50-100) first for deep scratches, then the full sequence 200-3000 to restore the gloss.
Either the sealer differs, the final grit mismatches the floor, or the repair was not feathered. Re-polish with feathered edges to the floor's finish grit and apply the same sealer.
Scratches on polished concrete are fixable when you match the method to the depth: fine pads and a burnish for surface marks, a coarse pass plus the full progression for deep grooves, and careful feathering so the repair vanishes into the floor. Clean between grits, match the final gloss and sealer, and test the repair at a low angle before calling it done. Repaired right, the floor looks uniform — and the scratch is gone for good.
Written and reviewed by JOY TECH - an SGS & BV audited, CE/RoHS certified diamond tools manufacturer founded in 2004, exporting to 50+ countries.
Our factory and quality management system are audited by SGS and Bureau Veritas. Products meet CE/RoHS requirements and every piece is 100% inspected before packing.
Verified Certificates
