Average response time: under 24 hours
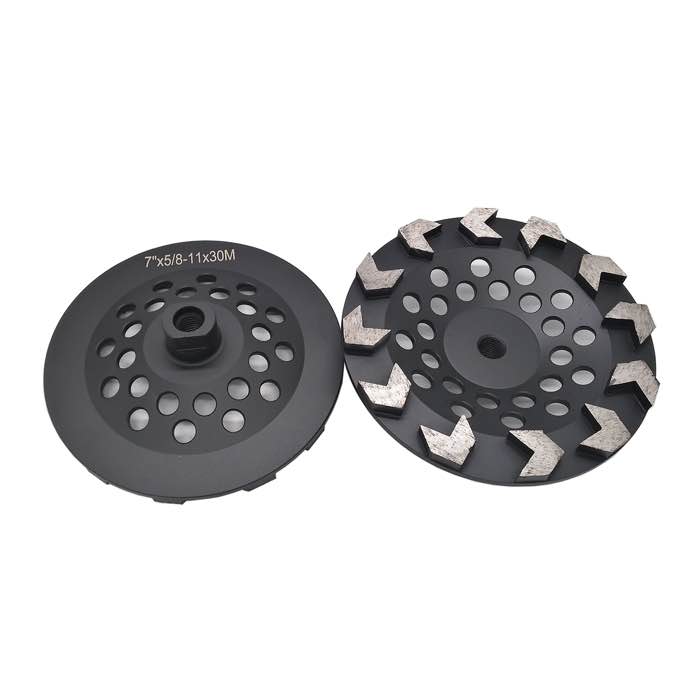
To grind concrete smooth without ridges, overlap each pass by one-third to one-half of the disc width, keep the grinder flat and moving, and let the disc's weight do the work instead of pressing on one side. Ridges form where consecutive passes fail to overlap or where the operator tilts the machine onto an edge. Grind in a consistent pattern, change direction between passes, and check flatness with a straightedge every few passes so high spots are removed instead of polished over.
Ridges are not caused by the concrete — they are caused by the operator's passes. When each pass sits beside the last with no overlap, the untouched strip between them remains high, and the grinding marks read as a series of raised lines. Tilting the machine also digs the leading edge deeper, creating a furrow beside a ridge. Finally, stopping the grinder in one spot lets the disc dwell and cut a shallow bowl.
Move the grinder so each pass covers 50-70% of the previous pass. With a 300 mm disc, advance about 150 mm per pass. Overlap sounds slow, but it is the single factor that decides whether the floor comes out flat. On the return pass, shift your line half a disc width again so the overlap pattern crisscrosses instead of repeating the same seams.
Keep the machine moving at a steady pace. A constant speed gives every point equal cutting time; hesitation cuts deeper, and speeding up leaves material behind. Long, straight passes beat short scrubbing motions, which leave a patchwork of overlapping arcs.
The disc must stay parallel to the floor. If you lean on the handle, the front edge digs in; if you lift, the rear edge cuts deeper. Use the machine's own weight and steer rather than push. On a handheld grinder, hold it so the cup wheel is square to the surface and sweep it in straight lines rather than arcs.
Check the disc itself: a worn or uneven segment set makes one side cut deeper. Replace or re-dress segments that are visibly uneven. The tooling matters as much as the technique — a worn diamond grinding cup wheel produces a scalloped finish no matter how careful you are.
Start with a coarse grit (metal bond 25-40) to remove high spots, then move to a medium grit only after the floor is flat. If you switch to fine grit too early, the fine disc skates over the high spots and polishes them smooth without removing them — you get a shiny but wavy floor.
Check flatness every few passes with a straightedge or a 2 m level. Mark any spot that rocks, grind that area in a tight crisscross pattern, and re-check. For joints and edges, use a handheld grinder and feather the transition into the main grind so the edge does not stand proud. A good edge treatment matters as much as the open floor — see how to grind concrete steps and edges smooth for the hand techniques.
If you do find ridges after finishing, go back to a coarse metal-bond disc and grind the affected area with overlapping crisscross passes until the straightedge sits flat, then re-run your grit sequence.
A worn tool creates ridges regardless of technique, so keep a sharp double-row diamond cup wheel on the machine.
Passes did not overlap or the machine was tilted. Overlap each pass by half the disc width, keep the machine level, and check flatness with a straightedge as you go.
Overlap by at least one-third, ideally one-half, of the disc width. Consistent overlap is what removes the material evenly and prevents untouched strips between passes.
Yes. Go back to a coarse metal-bond disc, grind the ridged area with overlapping passes until flat, then repeat the finer grits. Polished concrete can always be re-worked.
No. Extra pressure deepens the cut under the disc edge and creates ridges. Let the machine weight work and control the pass pattern instead.
A smooth, ridge-free concrete floor comes from controlled passes, not brute force: overlap by half a disc width, keep the machine flat, check flatness as you go, and stay on coarse grit until the slab is truly level. Fit good diamond tooling and re-dress it when it wears unevenly. Follow this pattern and the floor will be flat, even, and ready for the next stage of finishing.
Written and reviewed by JOY TECH - an SGS & BV audited, CE/RoHS certified diamond tools manufacturer founded in 2004, exporting to 50+ countries.
Our factory and quality management system are audited by SGS and Bureau Veritas. Products meet CE/RoHS requirements and every piece is 100% inspected before packing.
Verified Certificates
