Average response time: under 24 hours
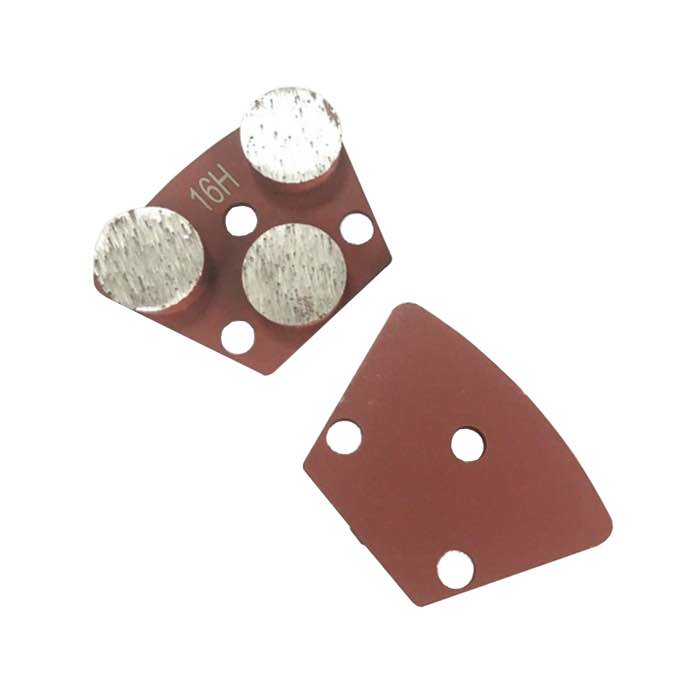
To level a concrete patio for outdoor tiles, first mark the high spots with a straightedge and level, then grind them down with a diamond cup wheel on an angle grinder or a walk-behind grinder. Keep the patio's existing drainage slope (usually 1 to 2 percent away from the house), do not grind the whole slab flat, and finish by vacuuming and checking the surface is clean, sound and within 3 mm of flat over 2 m.
Outdoor tiles are laid on a bed of thin-set or mortar, and that bed can only compensate for so much unevenness. If the concrete patio has high spots, the tiles will rock, crack or pop loose under foot traffic and freeze-thaw cycles. Low spots are less critical because the mortar bed fills them, but they waste material and can trap water. Grinding the high spots down is faster, cleaner and more reliable than building up low spots with self-leveling compound outdoors.
Before any grinding, walk the patio with a 2 m straightedge and a level. Mark high spots with chalk or a pencil. Check the slope: outdoor patios should drain away from the house at about 1 to 2 percent (10 to 20 mm drop over 1 m). Do not flatten the slope just because a spot is high; grind only the bumps that are above the intended plane, not the whole slab. Also check for spalling, loose concrete, or hollow areas that need repair before tiling.
Put the grinder flat on the marked high spot and make slow overlapping passes. Do not press down; let the diamond disc do the work. Check the surface with the straightedge every few passes. It is easy to grind too much and create a low spot, so go in small increments.
As you grind, keep the level handy and re-check the drainage slope. The goal is a flat plane that still falls away from the house. If you are unsure, stop and take a measurement rather than guessing.
When the high spot is down to the surrounding level, feather the edges of the ground area so there is no visible step. Run the grinder in wider, lighter passes to blend the scratch pattern with the rest of the patio.
Outdoor patios are often ground wet to keep silica dust down, especially if you do not have a vacuum. Wet grinding also keeps the disc cooler and extends its life. Have a hose and a squeegee ready, and plan to let the patio dry completely before laying tiles. Dry grinding with a HEPA vacuum is faster and leaves the surface ready sooner, but you must control the dust.
After grinding, sweep and vacuum the patio thoroughly. Any dust, laitance or loose aggregate will weaken the bond with the thin-set. Check the surface with the straightedge again; you should be within 3 mm over 2 m for outdoor tile work. If there are cracks wider than 2 mm, fill them with a flexible concrete repair compound before tiling. The patio should be clean, dry and structurally sound.
Once the patio is ground and clean, lay a few tiles dry to check the flatness. Walk across them; there should be no rocking. Mark any remaining high spots and touch them up. When the surface is within tolerance, you are ready to apply thin-set and lay the outdoor tiles.
If the patio has a drain, the concrete around it must slope toward the grate, not away. Grind the high spots so the fall leads into the drain, and check with a level as you go. For edges that meet a house wall or a step, use an angle grinder with a small cup wheel to feather the edge without rounding it over. Do not grind the nosing of a step; that creates a trip hazard. If the patio abuts a planting bed, keep the ground area back from the edge so the tile overhang is consistent.
After dry grinding, wait until the surface is fully vacuumed and free of dust, which usually takes a few hours. After wet grinding, let the patio dry for at least 24 to 48 hours, depending on humidity. Tile adhesive and thin-set need a dry substrate; moisture trapped under outdoor tiles causes efflorescence, freeze-thaw damage and bond failure. If you are in a hurry, use a fan or a leaf blower to speed drying, but do not tile over a damp slab.
Written and reviewed by JOY TECH - an SGS & BV audited, CE/RoHS certified diamond tools manufacturer founded in 2004, exporting to 50+ countries.
Our factory and quality management system are audited by SGS and Bureau Veritas. Products meet CE/RoHS requirements and every piece is 100% inspected before packing.
Verified Certificates
