Average response time: under 24 hours
Polished concrete in a data centre or machine room carries a cleanliness brief most warehouse floors do not face: dust, static behaviour, protected equipment zones and handover deadlines govern sequencing. The PM judges substrate condition, agrees static and dust targets with owner and vendors, phases work around fit-out, and closes interfaces with raised floors, trenches and plinths to a measurable standard. This guide covers substrate checks, dust and ESD requirements, work windows, process order and edge interfaces.
Scope usually covers hall floors, corridors, cable-trench surrounds, plinth and racking zones, and transitions to raised access floors. Before mobilization, the PM confirms slab age, strength, moisture, existing coatings and joint layout; any zone failing these conditions is recorded in the tender assumptions rather than settled on site.
Record slab age in days, compressive strength from cores or certificates, and condition at three points per 100 m²: sound, cracked, coated or sealed. A slab under 28 days still gains strength and may release bleed water; grinding early opens air voids in uneven paste. Test RH in probes; stop above 75–80% RH, holding surface temperature between 10 and 30 °C through grinding and sealing. Profile to CSP 1–2 heavy aggregate, CSP 3–4 medium removal, or CSP 5–7 fine near mirror finish; hollow patches are cut out before polishing.
Data centre acceptance treats airborne dust as a defect, not a by-product. Run every grinder with a connected HEPA vacuum, keep tools and sweepings inside the working zone, and wipe machines and fixtures after each pass. Bag slurry and dust at the segment edge, do not sweep dry across a finished area, and hold entry to the cleaned zone behind mats. Record daily dust complaints from neighbouring fit-out crews so repeated sources can be isolated before handover.
Static performance is set by the equipment vendor, not the polishing finish alone; confirm the required surface resistance band and whether a dissipative sealer is specified. Common ESD floors target surface resistance in the 10⁶ to 10⁹ Ω range, with grounding and any conductive grid verified separately. A dense polish reduces dust but does not by itself make a slab dissipative; agree the test method, probe spacing and reading point with the owner before sealing.
Most machine-room polishing follows fit-out milestones rather than a fixed night window. Agree which halls are free of equipment, which routes carry cabling or crane access, and the clearance time before racks arrive. Phase work so densifier and seal coats cure without traffic; a coat interrupted by early racking cannot be repaired invisibly. Keep a daily sequence note: zones ground, zones densified, zones sealed, and zones released, so the owner sees progress against each fit-out deadline.
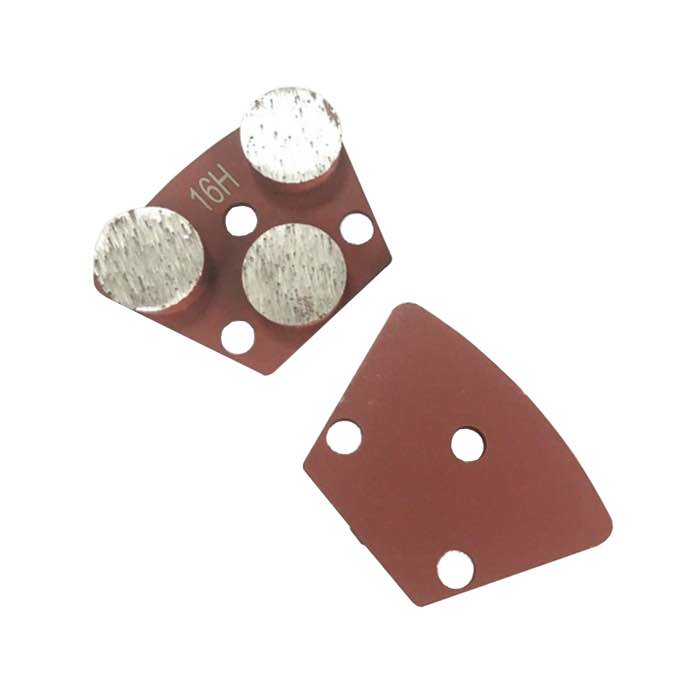
Run the sequence metal bond to resin in full-floor passes. Metal starts at 16 or 20 grit for heavy removal and open aggregate, then 30 and 40 grit to level ruts and transitions; skip a grit only after a straightedge check clears deeper scratches. Resin follows 100, 200, 400, 800, then 1500 or 3000 grit; scratches carried to 800 grit cannot be hidden by 1500 grit. Apply densifier when dust-free; dilute silicate 1:64 ≈ 15 ml/L first coat, 1:128 ≈ 8 ml/L second coat, keep wet-working 20–30 minutes, wait 4–12 hours between coats.
Equipment interfaces are where disputes concentrate: trench edges, plinth bases, column isolation rings and raised-floor thresholds. Hone and seal these edges so no arris chips under boot or trolley traffic; leave clean joint lines against metal trims and do not grind over thresholds into adjacent materials. Check transitions with a straightedge and level; a raised edge trips on access floors, a recessed joint collects dust that cannot be wiped out. The main interface zones follow.
| Zone | Edge treatment | Check | Release condition |
|---|---|---|---|
| Trench surround | Honed arris, flush seal | Straightedge ≤2 mm/2 m | No slurry in trench |
| Plinth base | Caulk joint, flush densifier | Tap test, solid | Sealed before plinth |
| Column isolation ring | Isolation joint, flush fill | 5 mm gap | No adhesion on column |
| Raised-floor threshold | Honed flush, strip | Level, no trip step | Walk-on checked |
| Perimeter skirting | Coved seal upstand | 20 mm continuous | No wall gap |
Run the final inspection with the owner and equipment representative against the schedule: dust trace, gloss and slip readings, ESD resistance where specified, joint and interface status. Photograph each hall under the same lighting and keep readings in the binder. Frequent disputes are dust residue after cleaning, gloss mismatch between phases, unsealed trench edges, and ESD readings off band after sealing.
At handover, supply the finish schedule, grit sequence, dilutions, reading records and a maintenance note: dry dust-mop daily, clean spills promptly, avoid harsh acids and high-pressure hot water on the sealed finish. Protect fresh seal coats for walk-on and heavy-traffic times, typically 24–72 hours before equipment traffic resumes. Reseal on traffic, not calendar: machine-room floors reseal on a 3–5 year cycle, high-traffic aisles on a 2–3 year cycle; re-check ESD readings after any reseal.
Written and reviewed by JOY TECH - an SGS & BV audited, CE/RoHS certified diamond tools manufacturer founded in 2004, exporting to 50+ countries.
Our factory and quality management system are audited by SGS and Bureau Veritas. Products meet CE/RoHS requirements and every piece is 100% inspected before packing.
Verified Certificates
