Average response time: under 24 hours
A basement slab below grade serves storage, hobby use and occasional garage parking. Before the crew arrives, the foreman and client's representative fix base condition, area split and acceptance measurements, so damp, hollow spots and finishing disputes stay out of sign-off. The work covers living rooms, the garage bay, utility corner and stair landings; the foreman logs slab age, strength, membrane, joints, repairs and moisture.
Basement concrete pours with the frame; after the cement skin and soft mortar are ground away and pores locked with hardener, the surface sheds no film dust and takes cartons, bikes and shelving. Three area types follow: a living room needing a steady sheen, store and utility corners where abrasion and grease dominate, and the garage bay where tyres and tools mark the polish. Dry rooms take a CSP 5–6 honed look; upkeep is a dry mop and mild detergent.
Before site setup, the foreman logs every corner: slab age, finish, coatings, repairs, cracks, joints, membrane and patching mortar. Rising damp reads as dark staining along outside walls; probe 20–30 mm deep, repeat after 24 h, and grind only at 75–80% RH and a 10–30 ℃ surface. Check the membrane for overlaps and punctures first; a failed membrane is sealed or replaced on paper, not polished over.
Break the cellar into corners of about 120–250 m², each with access, dust extraction and tape line; garage bay and utility room split off because slip and wear goals differ. Lay out skirting edges, thresholds and nosings early, as edge grinders cannot reach them once the middle is sealed. Garage traffic adds oil, tyre marks and lifting gear, so the bay gets a penetrating sealer and 400–800 honed look, not a mirror polish.
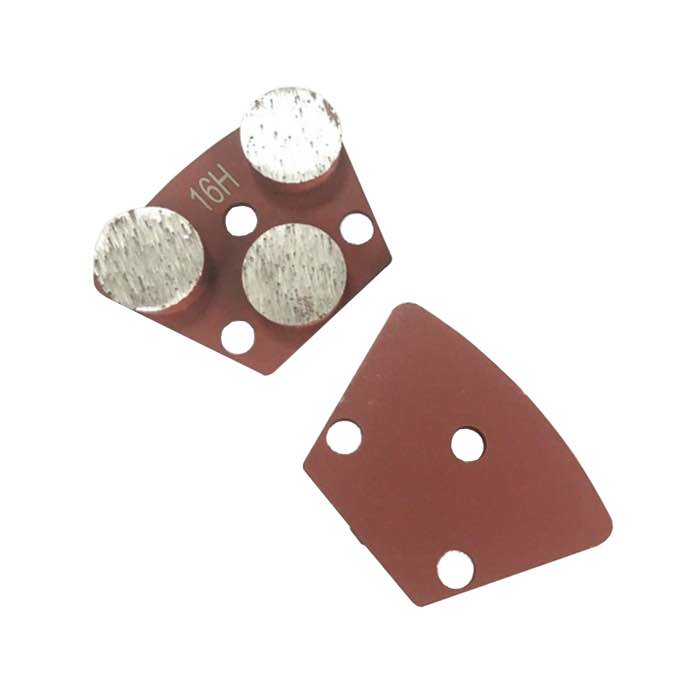
Follow the abrasive ladder from metal bond through resin discs in full floor lanes. Metal starts on 16 or 20 grit to cut the cement skin, flatten trowel ridges and flag weak patches, then 30 and 40 for an even tooth; skip a disc only when the straightedge clears deeper ridges. Resin discs go 100, 200, 400, 800, then 1500 or 3000; a scratch left at 800 will not disappear under 1500. Hardener goes on dust-free: first coat 1:64, roughly 15 ml per litre, second 1:128, roughly 8 ml per litre, face wet 20–40 minutes. Check each disc under oblique 300–500 lux light.
| Step | Abrasive | Machine setting | What it achieves |
|---|---|---|---|
| Metal bond | 16–20 grit | 45–65 kg head, 2–3 passes | Open cement paste, expose weak spots |
| Resin discs | 100–400 grit | Light pressure, one pass per disc | Lift the metal scratch lines |
| Polishing | 800–3000 grit | Lightest pressure | Even sheen; mirror only in rooms |
Polished concrete meets timber skirting, door frames and stair trim around the perimeter. Leave a 5–10 mm expansion gap between slab and fixed woodwork, fill it with flexible sealant rather than hard mortar, and keep the hand-ground edge level with the adjacent finish. At thresholds, fit a narrow transition strip and match gloss to the room beyond; where a later kitchen or cabinet will sit, mark the fixing line and protect the sealed surface from drill dust.
Sign-off criteria are fixed on paper before crews begin, tied to measured tests rather than the word smooth. The grid takes one reading per 120–200 m², plus fixed checks at walls, skirtings, thresholds and the garage bay. Look for scratches and haze under oblique 300–500 lux light, check levelness with a 2 m rule, and log slip by dry and wet PTV on damp-prone paths; wet corners carry R10–R12. Wall and below-grade moisture readings are repeated before signature.
| Area | Checked item | Pass condition | Evidence filed |
|---|---|---|---|
| Habitable room | 60° gloss | Honed 40–50 units, two spots per 50 m² | Meter log signed off |
| Storage and garage | Gloss, slip | Diff ≤5, >15 rework; dry PTV ≥36 | Photo plus PTV record |
| Threshold and skirting | Flatness, DCOF | 2 m straightedge ≤2–3 mm; DCOF ≥0.42 | Layout sketch, edge check |
Typical disputes are damp patches after sign-off, hollow spots when tapped, grease marks in the garage, scuffs after storage shifts, gaps between floor and skirting. Run the final walk-through with the client's representative against the bid timetable, tagging each defect before any fix. Responsibility follows the survey notes: base-build slab or membrane faults found beforehand belong to the main contractor, finish flaws after the abrasive ladder are the polishing team's to correct.
On sign-off, hand over the finish plan, abrasive ladder, product dilutions, joint details, moisture logs, gloss and slip sheets, care note. Tour the cellar with the client's representative, pointing out check points and how readings were taken; every corner carries a signed log, open items a date, owner and fix. The wearing bed beds down over 6–12 months, dull spots by doors being normal early wear. Sealer on garage and storage paths limits marks; living corners renew every 3–5 years, busy paths every 2–3 years.
Written and reviewed by JOY TECH - an SGS & BV audited, CE/RoHS certified diamond tools manufacturer founded in 2004, exporting to 50+ countries.
Our factory and quality management system are audited by SGS and Bureau Veritas. Products meet CE/RoHS requirements and every piece is 100% inspected before packing.
Verified Certificates
