Average response time: under 24 hours
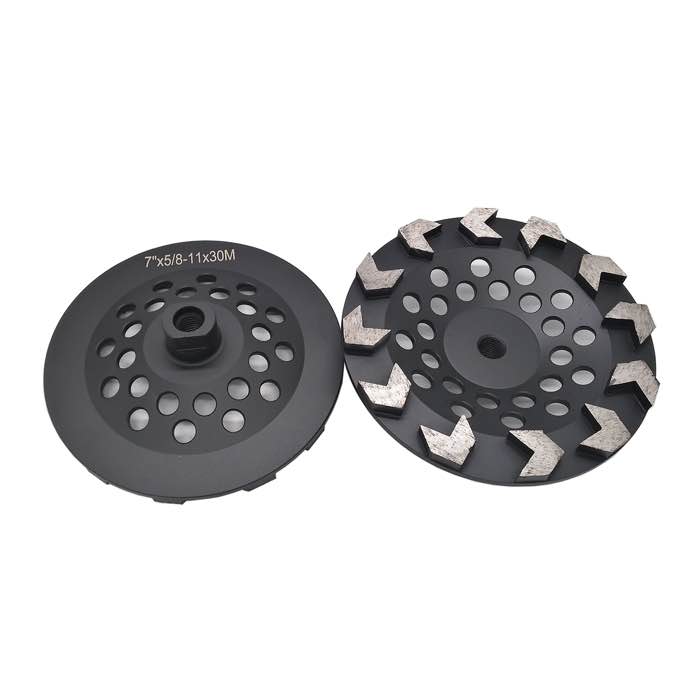
To level an uneven concrete transition between two slabs, find the high side with a straightedge or level, grind the high slab down in overlapping passes with a diamond cup wheel or floor grinder, and feather the grind well past the joint so the transition is gradual. Work in shallow passes, check the profile often, and stop as soon as the straightedge sits flat across the joint. A few millimeters of grinding is a normal fix; grinding more than that weakens the slab and needs a different approach.
Concrete slabs settle differently, are poured at different times, or shift along a joint, leaving one side higher than the other. The lip is usually 3-15 mm. Left alone it is a trip hazard, a water-collection point, and a problem for equipment wheels and door sweeps. Grinding is the standard fix because it removes the high side locally without touching the rest of the slab.
Lay a straightedge or a 2 m level across the joint in several directions and mark the high areas with chalk. Measure the step height with a feeler gauge or ruler — this tells you how much material must go. If the step is more than about 15-20 mm, grinding alone will eat the aggregate and weaken the edge; consider cutting a control joint or patching instead.
Check whether the high side is high concrete or high joint filler. Filler grinds quickly and may be removed almost entirely; concrete grinds slowly. Also confirm there is no metal beneath the surface (rebar, screed pins) in the grind zone.
Use a floor grinder for long transitions or a handheld grinder with a diamond grinding cup wheel for short ones. Start on the high side and work in overlapping passes toward the joint, feathering the grind out 200-400 mm past the joint on the low side so the transition is a long gentle ramp, not a step.
Work in shallow passes. Removing the high spot in one deep grind cuts a trough; several light passes let you check the profile and stop at the right depth. After each few passes, lay the straightedge across the joint again and grind only where it rocks. The straightedge is the only reliable judge — the eye cannot see 2 mm.
For the flatness technique that avoids creating new ridges, follow the same overlap rules as any concrete grind; see how to grind concrete smooth without leaving ridges.
The transition must blend into both slabs, not just meet them. Extend each pass beyond the joint and reduce depth gradually at the ends. Check the result by walking across the joint and rolling a hand truck or wheeled cart over it — if it catches, grind a little more. Finally, clean the dust from the joint and, if the joint filler is exposed, top it flush or seal it to keep water out.
If the concrete surface will be finished (sealed or polished), match the final grit to the surrounding floor so the transition is invisible. For a quick exterior fix, a rough grind that is flat is enough.
Take the high side down with a coarse diamond grinding cup wheel in controlled passes.
A few millimeters is a normal fix with grinding. Steps over about 15-20 mm should be handled differently — cut a joint, patch, or consult a contractor — because deep grinding weakens the concrete.
For short transitions, a handheld grinder with a diamond cup wheel. For long ones, a single-disc floor grinder with metal-bond tooling works faster and flatter.
Lay a straightedge or 2 m level across the joint in several directions. When it sits flat with no rocking anywhere across the transition, the grind is done.
Shallow grinding of a few millimeters is safe on sound concrete. Deep grinding exposes aggregate and reduces the cover over reinforcement, so keep the removal shallow and local.
Leveling an uneven concrete transition is a measurement job followed by careful grinding: find the high side, grind in shallow overlapping passes, and feather the grind across the joint until a straightedge sits flat. Keep removal shallow, check often, and blend the finish. A level transition is safer, drains better, and rolls cleanly under wheels and feet.
Written and reviewed by JOY TECH - an SGS & BV audited, CE/RoHS certified diamond tools manufacturer founded in 2004, exporting to 50+ countries.
Our factory and quality management system are audited by SGS and Bureau Veritas. Products meet CE/RoHS requirements and every piece is 100% inspected before packing.
Verified Certificates
